How to Embed Maps for Events

Embedding a Google Map in to your event landing page makes life so much easier for your supporters, they can find you with just two clicks!
Here is a step-by-step guide to embedding the map feature in your next event.
Step 1
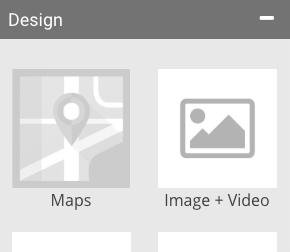
Go to the event landing page editor and find “Design” on the left-hand side of the screen, then click and drag the “Maps” icon to one of the space boxes that appear on the template. When you are hovering over a box with a plus symbol, let go of the mouse and the blank map block will appear.
Step 2
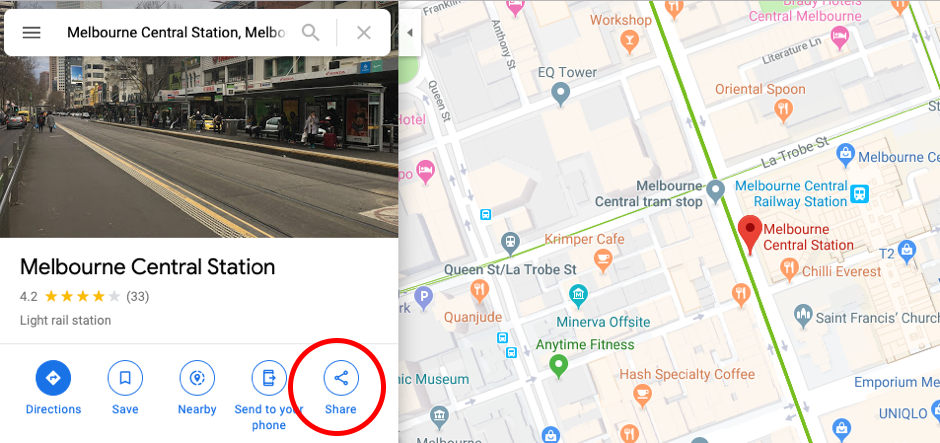
In a new tab, open google maps and search for the address where the event is happening. Then click on “Share” and a pop up will appear.
Step 2a
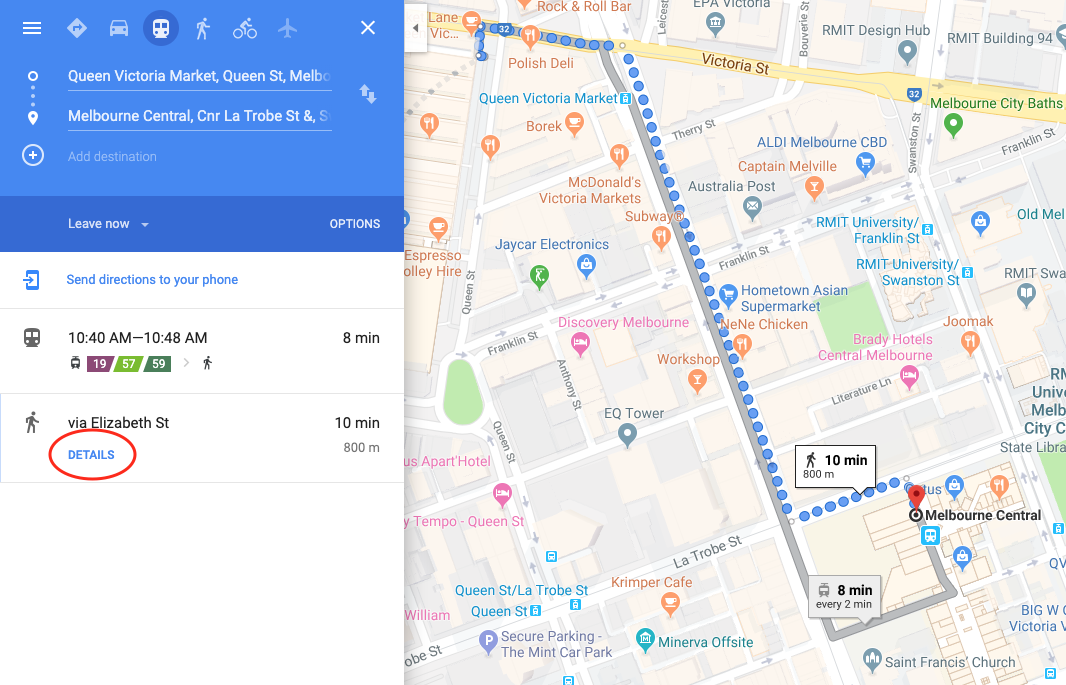
To embed a map with course directions, first choose "Directions" and add in the starting and finishing locations. Choose "Details" on the route you want, and then click on the "Share" icon.
Step 3
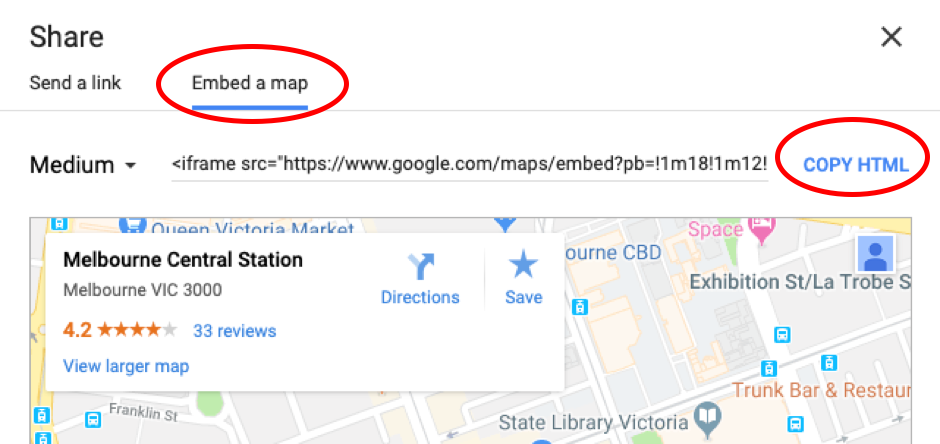
On the pop up, choose “Embed a map,” choose the size of the map (medium or large is best) and then click on “COPY HTML” on the right.
Step 4
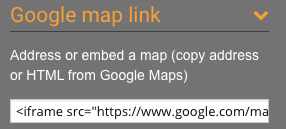
Go back to the event landing page template and click on the blank map block to open the settings panel on the left-hand side of the screen. Under the heading “Google map link” there is a blank textbox, right-click in the textbox and choose “paste” then click away from the box.
Step 5
Click “Save” in the top right corner of the screen and the map block will be ready on your event’s live site. Your supporters will be able to select “View larger map” which will take them to a new tab with your selected address on Google Maps.
